
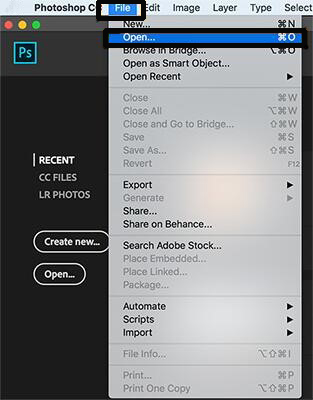
You might have heard about magic wand tool and, depending on how much you use Photoshop in your day-to-day life, ‘Magic wand’ is one of the quickest and easiest way to remove background from an image in Photoshop.
Photoshop is the powerful image editing software in the world. But to reveal that power, there's a few essential skills we need to have. One of them is knowing how to make selections. Without selections, we'd have no way to adjust or edit specific areas of an image. Magic wand is used to select an object of the image quickly in order to remove background or edit the image. Today’s online consumer like to see their product on a white background or without a background like amazon, eBay, shopify etc. This image editing tool helps you to achieve that goal quickly and easily.
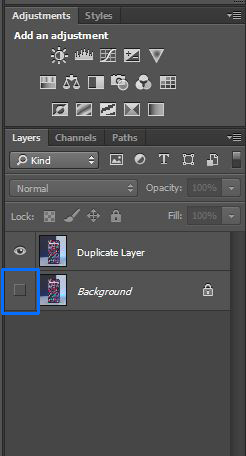
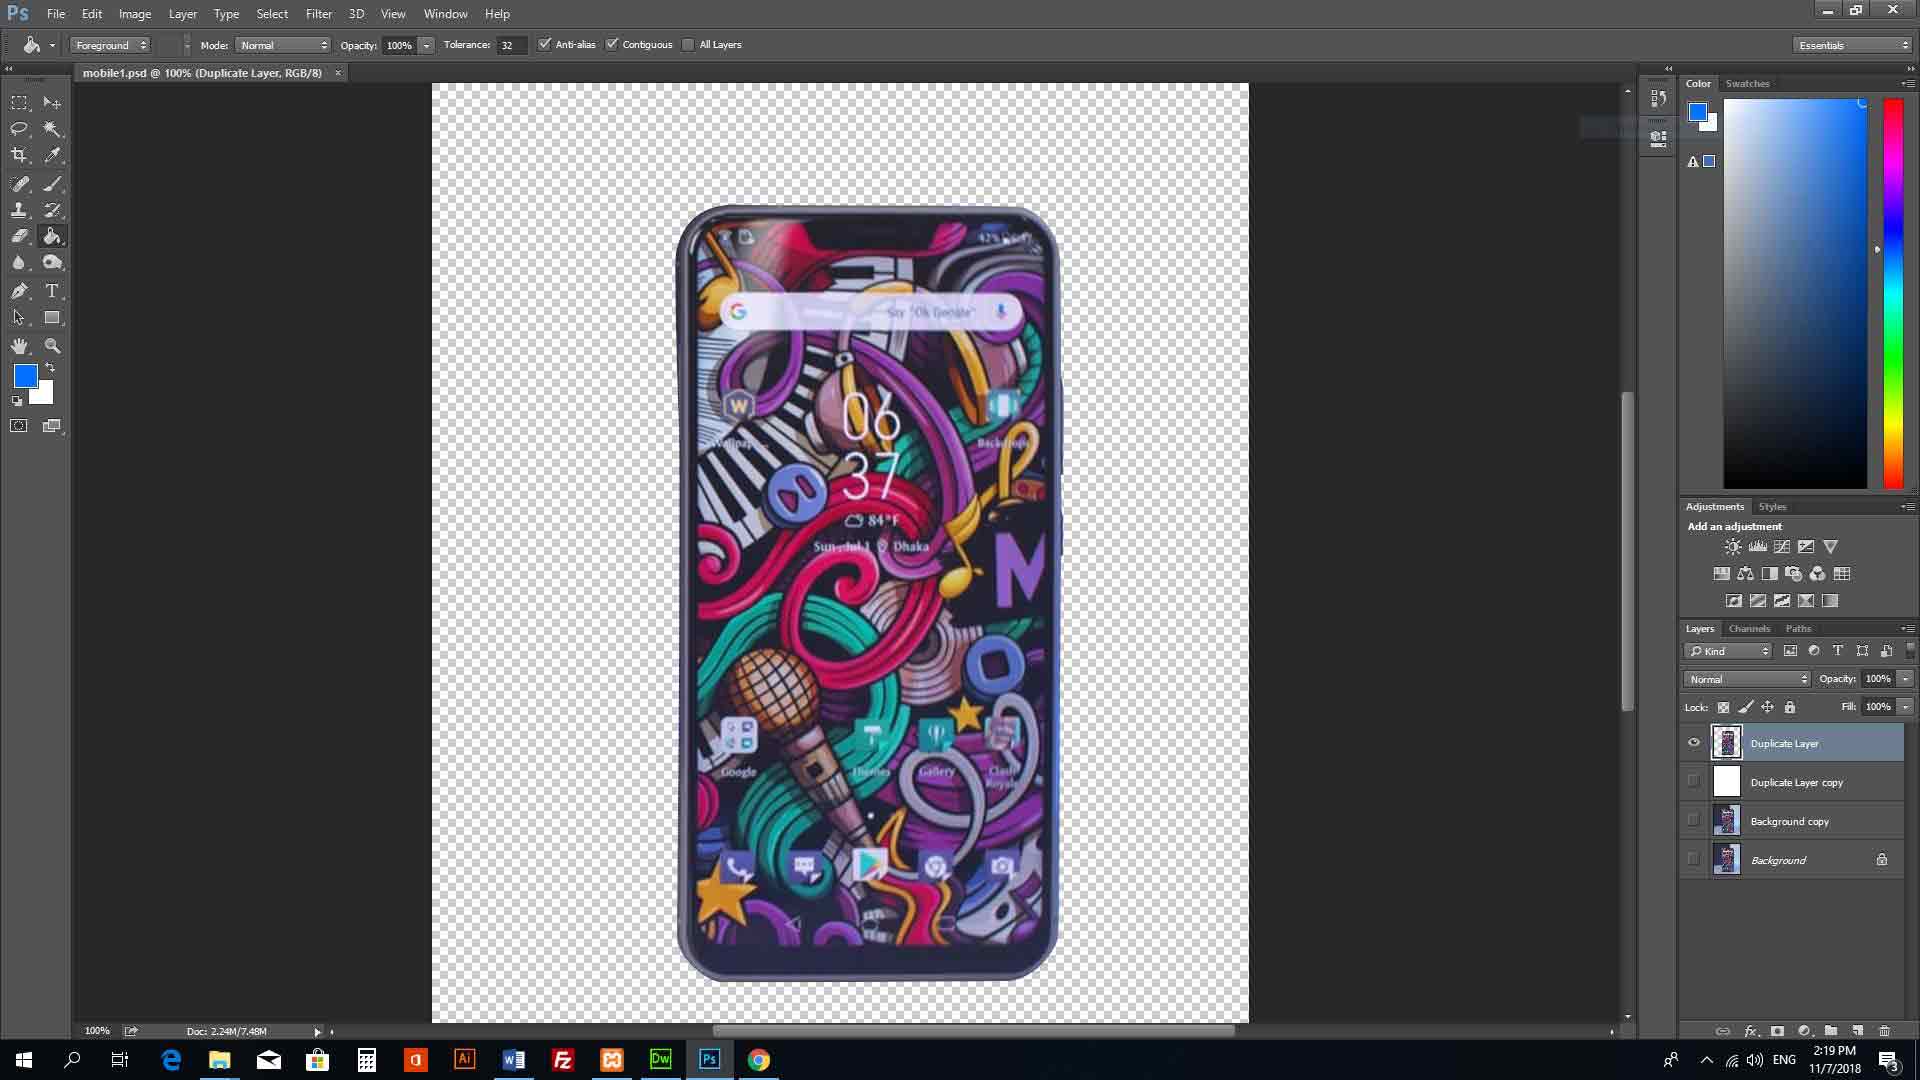
With your image open in Photoshop, open the Layers palette by clicking Window > Layers. Make sure the background layer is highlighted. Duplicate background layer by clicking Layer > Duplicate Layer.

At this stage you can give your duplicated layer a custom name. Giving your layer a name (such as “isolated”) will make your file easier to identify and use for others on your team who may need to access.
From your Layers palette, click on the eye icon next to the image thumbnail. This way, your original image will remain intact as you are working on the duplicate layer.
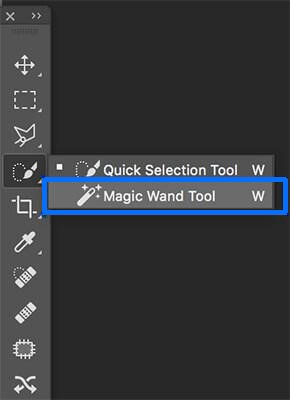
Click on the Quick Selection Tool in the Tools panel and keep your mouse button held down for a second or two until a fly-out menu appears. Select the Magic Wand from the menu.
At the top of the screen, you’ll see the options for adjusting how the Magic Wand Tool works. Specify one of the selection options in the options bar. The Magic Wand tool’s pointer changes depending on which option is selected.

There are two ways you can use Magic Wand Tool to select subject of an image: selecting the background and selecting the subject. The method you use will depends on whether or not the background of your image is one colour.
If the background of an image is solid colour or almost a solid colour, you can use the Magic Wand Tool to select the background.
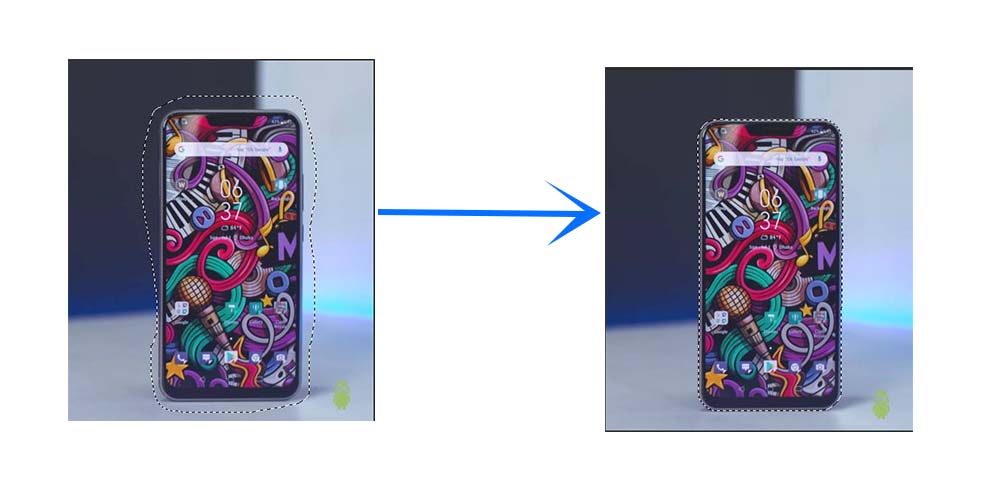
If the background is multiple colour, you have to select the subject of your image instead of the background. Photoshop CC18 has an option called Select Subject.
Once all the selection is done press Backspace(Windows) or Delete (Mac) to Remove Your Background. Now your image is on a transparent background. You now can put your image against any background you like.
Open the file that contains new background which you want to show behind your product. In the new background, select the entire image by clicking CTRL+A (Mac, COMMAND+A). Copy the selection by clicking CTRL+C (Mac, COMMAND+C).
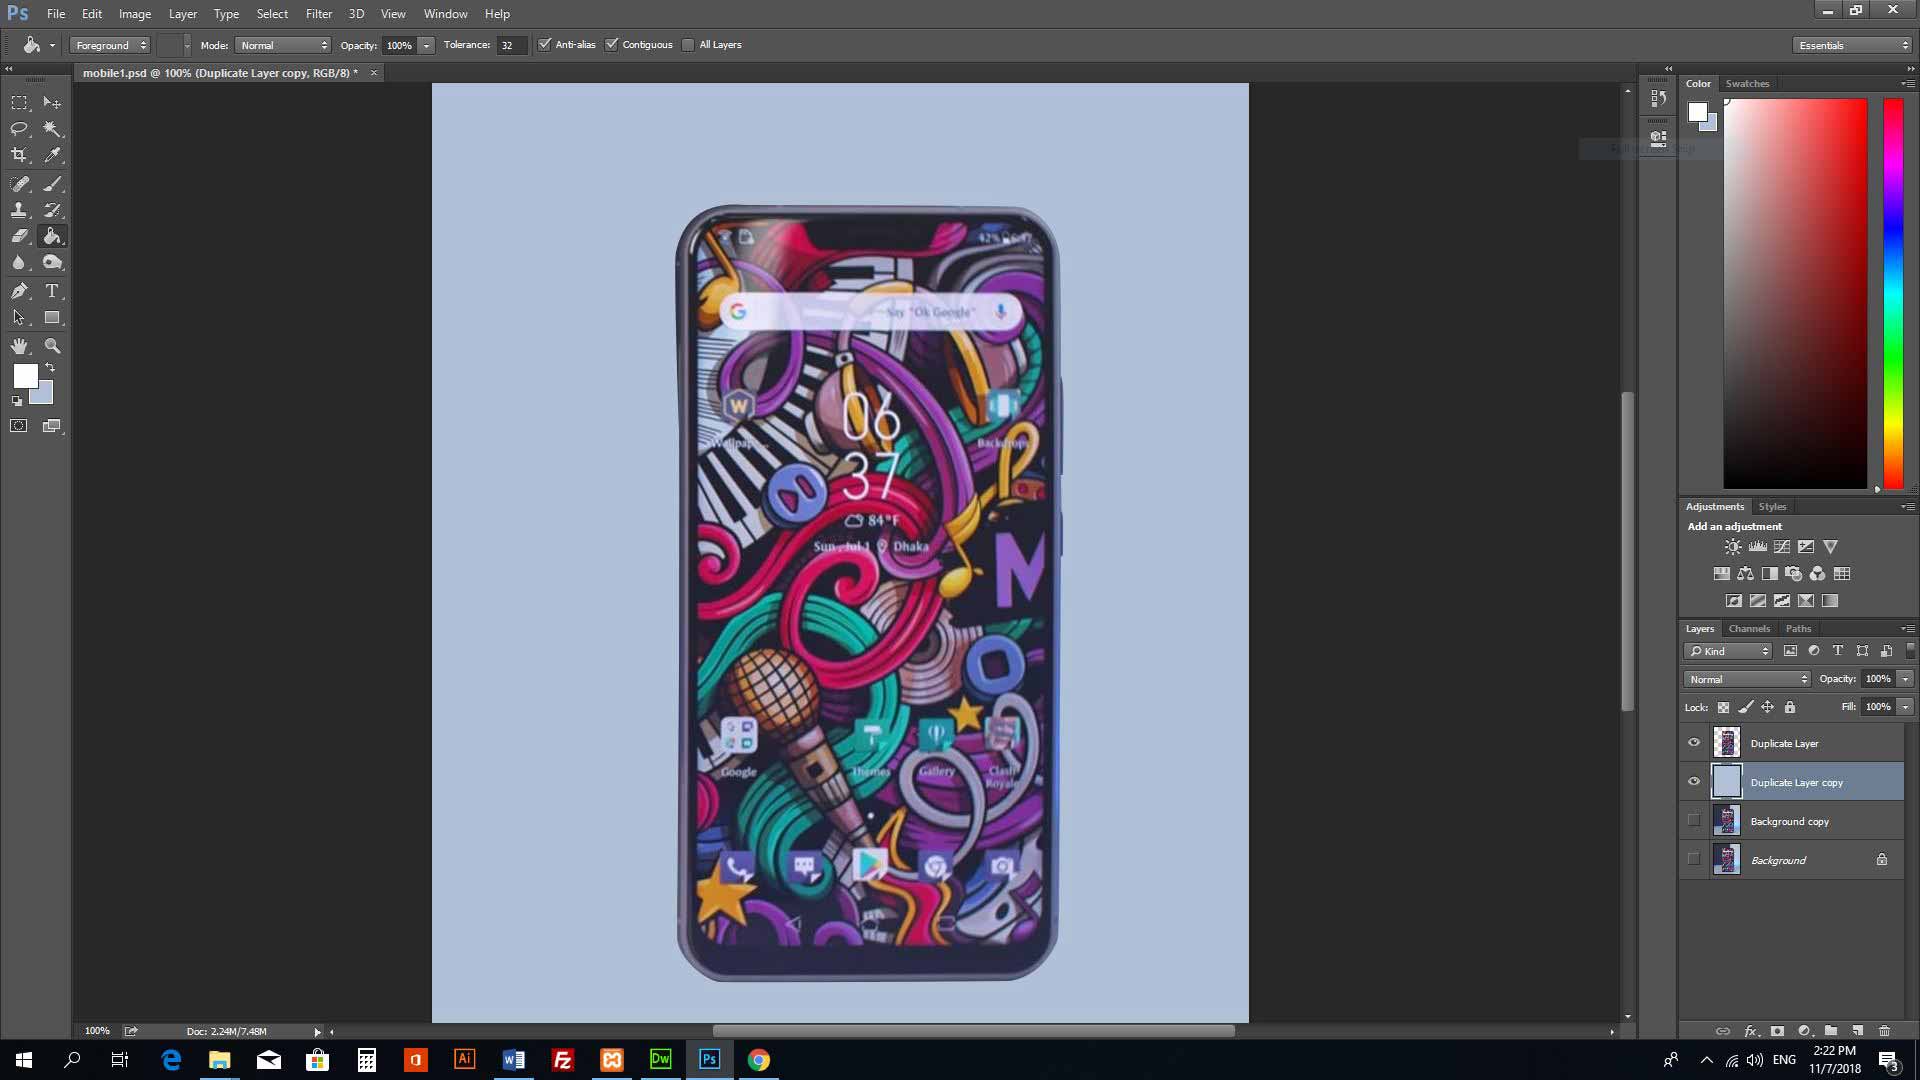
Go back into the file containing the subject you just isolated. Select the unaltered Background layer. Then, click CTRL+V (COMMAND+V on Mac) to paste the new background into the file.
The new background should appear as a new layer between your masked subject and original background. You can toggle the original background layer back to visible now.
If your original image was taken against a white background, you can set your new background layer blend mode to Multiply to pull the original shadows back into the new image.
You can add more layers for additional backgrounds, and toggle the eye icon next to each to see how they look with your subject.